Sending Messages with Google Sheets
Hi there! In this tutorial, you will learn how to send WhatsApp messages from a Google Sheets table in just a few steps. Using the tyntec Conversations API, you’ll send a single message to test the system, then send a batch of messages using a database in Google Sheets.
You will need
- Your tyntec API key from your tyntec account
- Your WhatsApp Business Account (WABA) phone number that has been assigned to you by tyntec
- Your Pre-Approved WhatsApp messages template accessible from your WABA
- A mobile phone with the WhatsApp application and a working phone number
Note: We are using a template called “appointment_confirmation” in our examples. This template takes two parameters and has the format:
“Your appointment is coming up on {{1}} at {{2}}”
Important: All phone numbers must be in the international format. Leading + or 00 may be omitted.
First, you need to make a table with the data of the messages you want to send in a batch. Then you’ll write a simple script, which will send these messages using tyntec’s API.
Step One: Create a table in Google Sheets
Prepare the data for your message batch in a Google Sheets table.
1. Go to Google Sheets and create a new table. We recommend setting the number format of cells to plain text.
2. Fill in the table with message contents.
For each message that is sent, the sheet provides a recipient number and input parameters, and displays the returned response status and info. Therefore, your columns will be:
- Number (Opted-in recipient)
- First parameter: {{1}} (in this case, a date)
- Second parameter: {{2}} (in this case, a time)
- If your template needs more parameters, set up additional columns
- Result (the final script below will add the result here)
- Info (the final script below will add extra result info here)
You may use header rows, you will tell the script to ignore them later.
3. Add your values for phone numbers and the input parameters.
Your table should look like this:
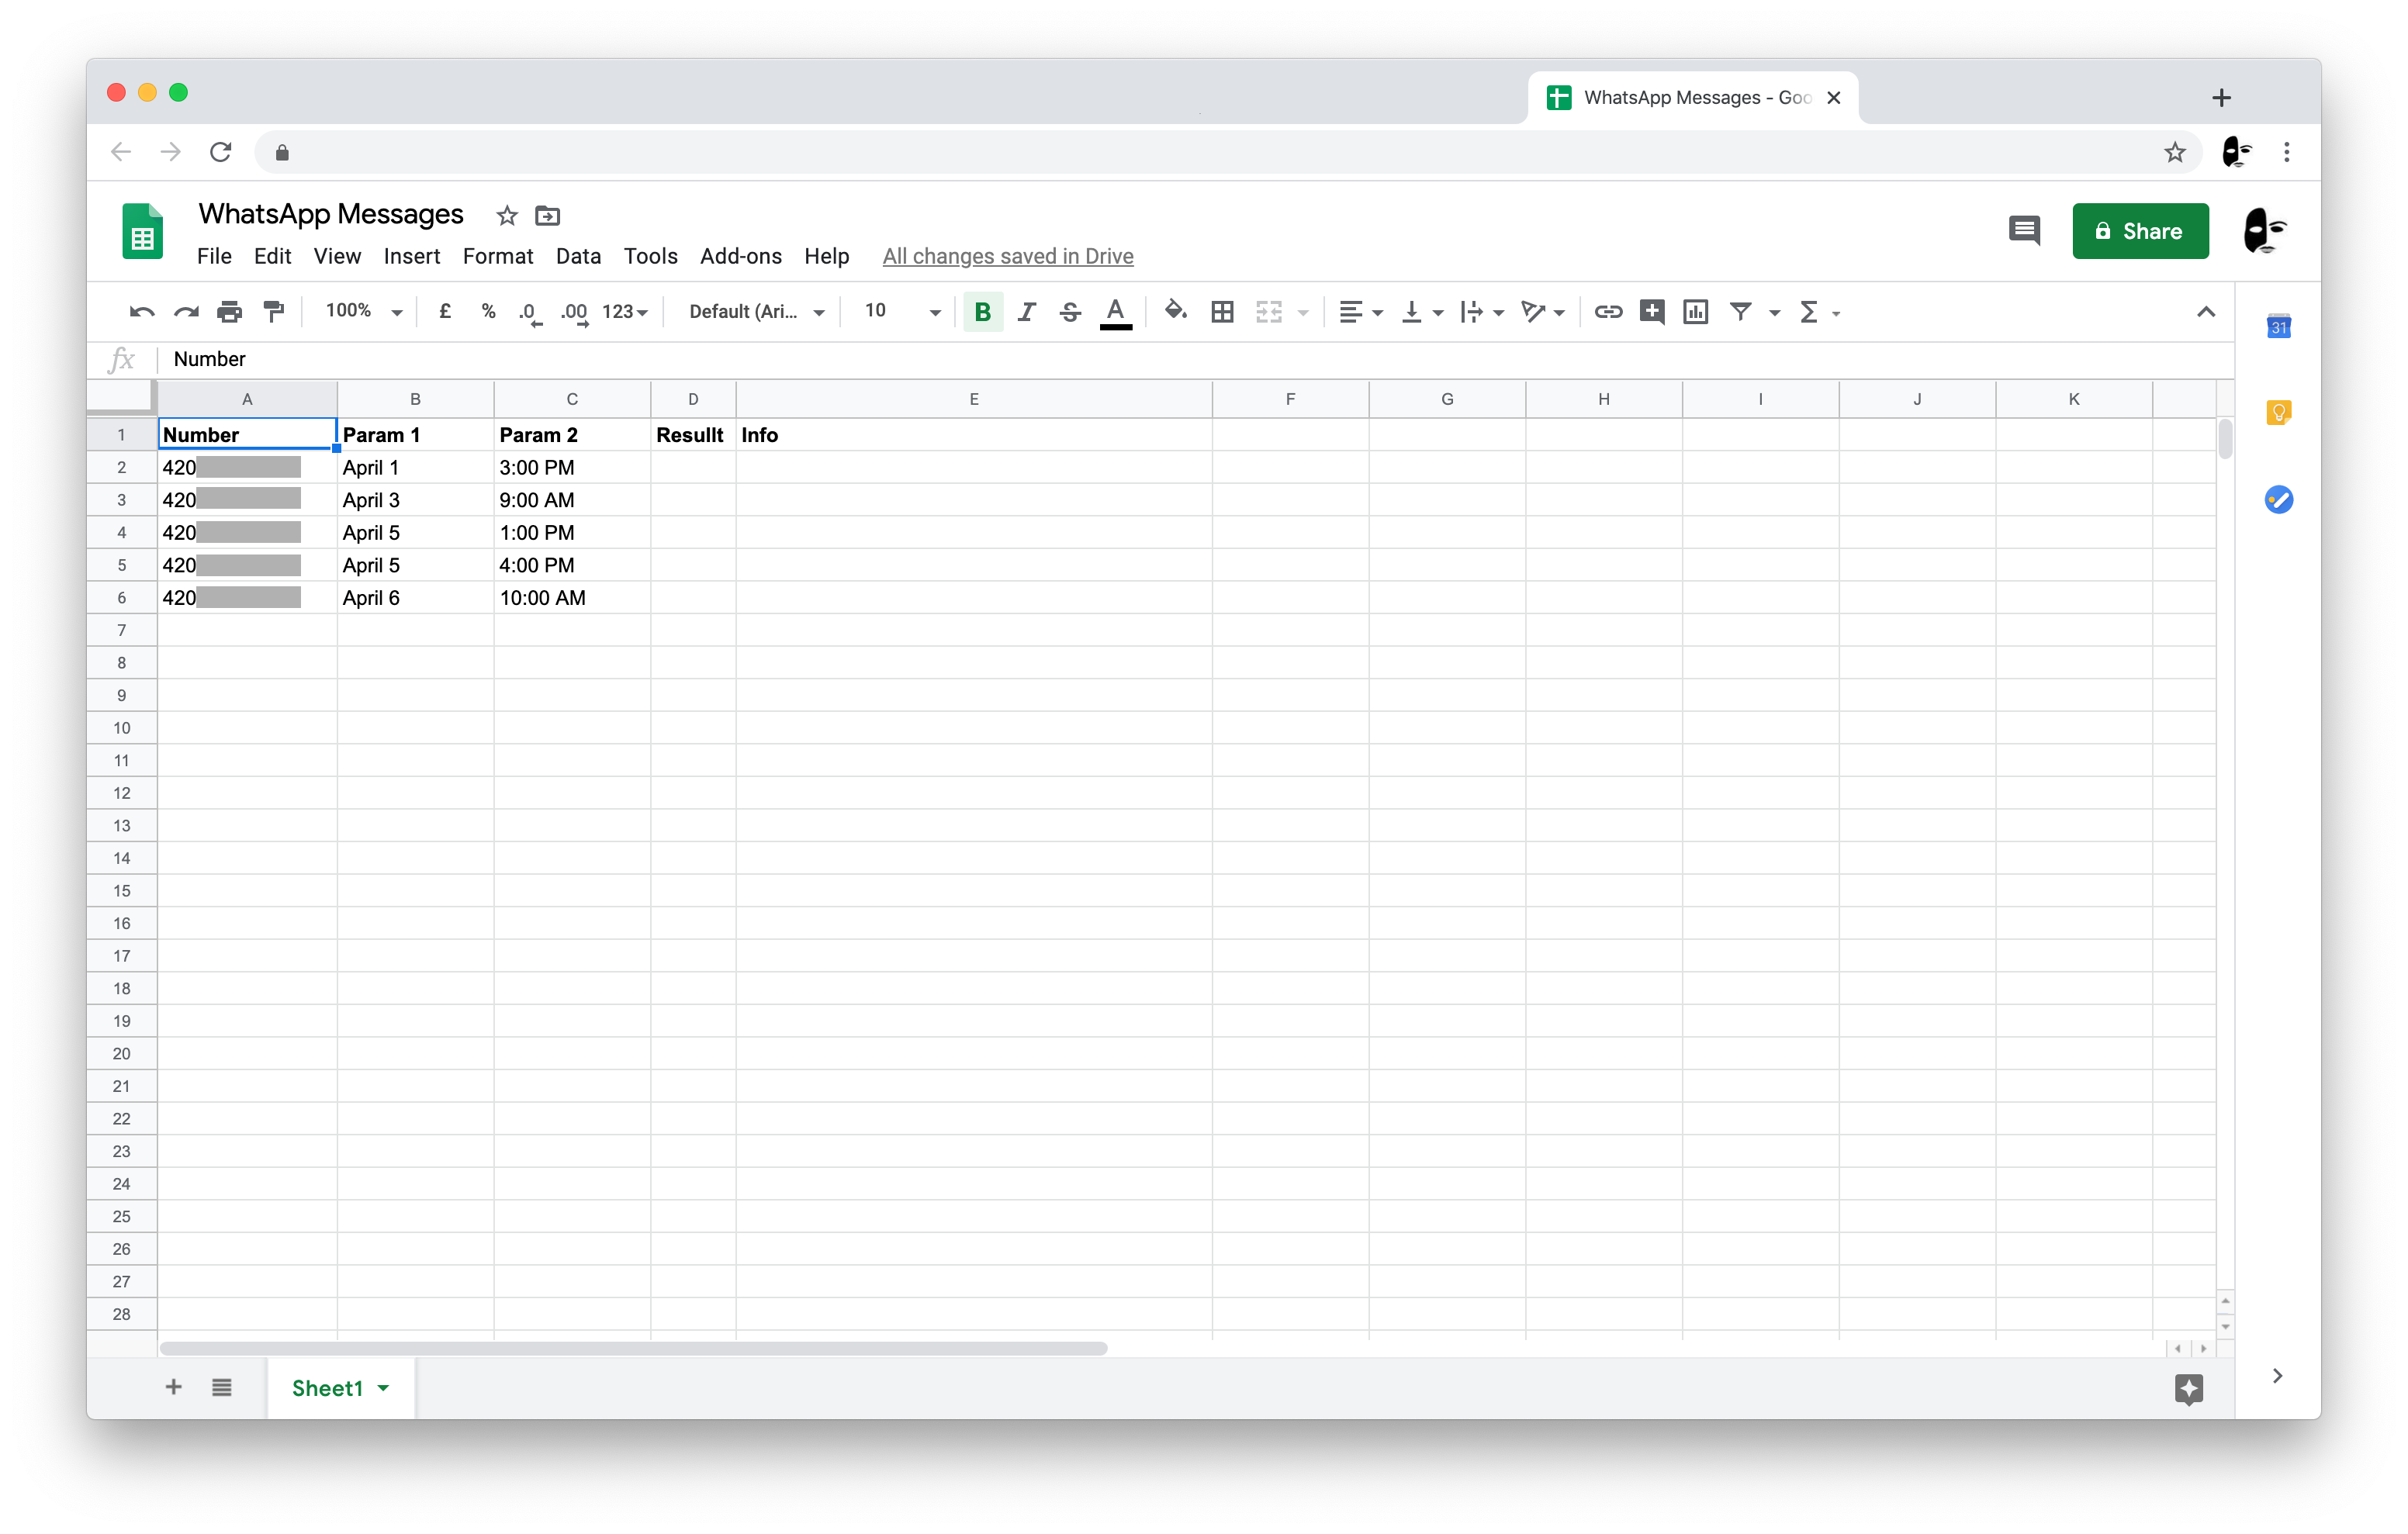
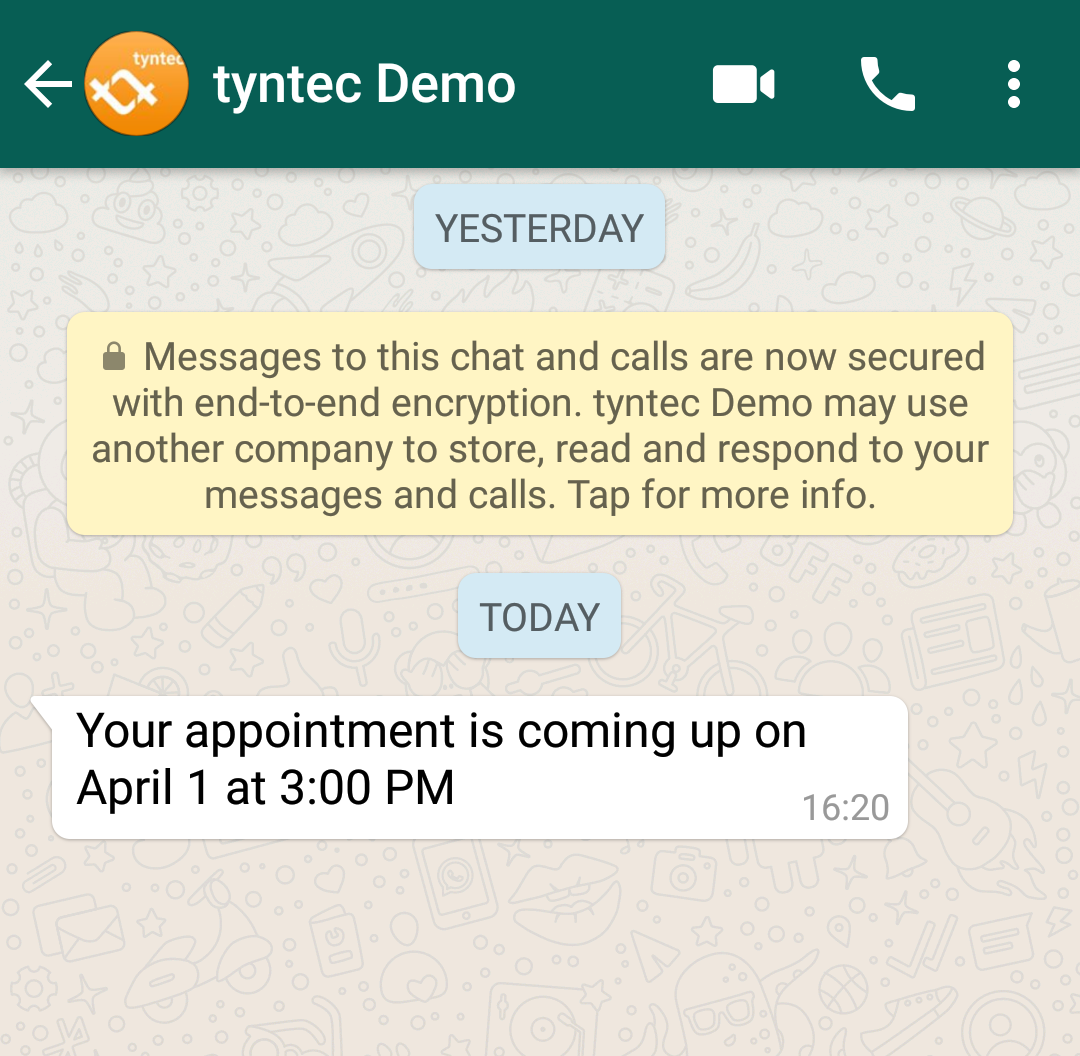
The resulting message for the first data row will read:
“Your appointment is coming up on April 1 at 3:00 PM”
Step Two: Create a script to send a testing message
You can start by sending a single message through the tyntec Chat API to test it.
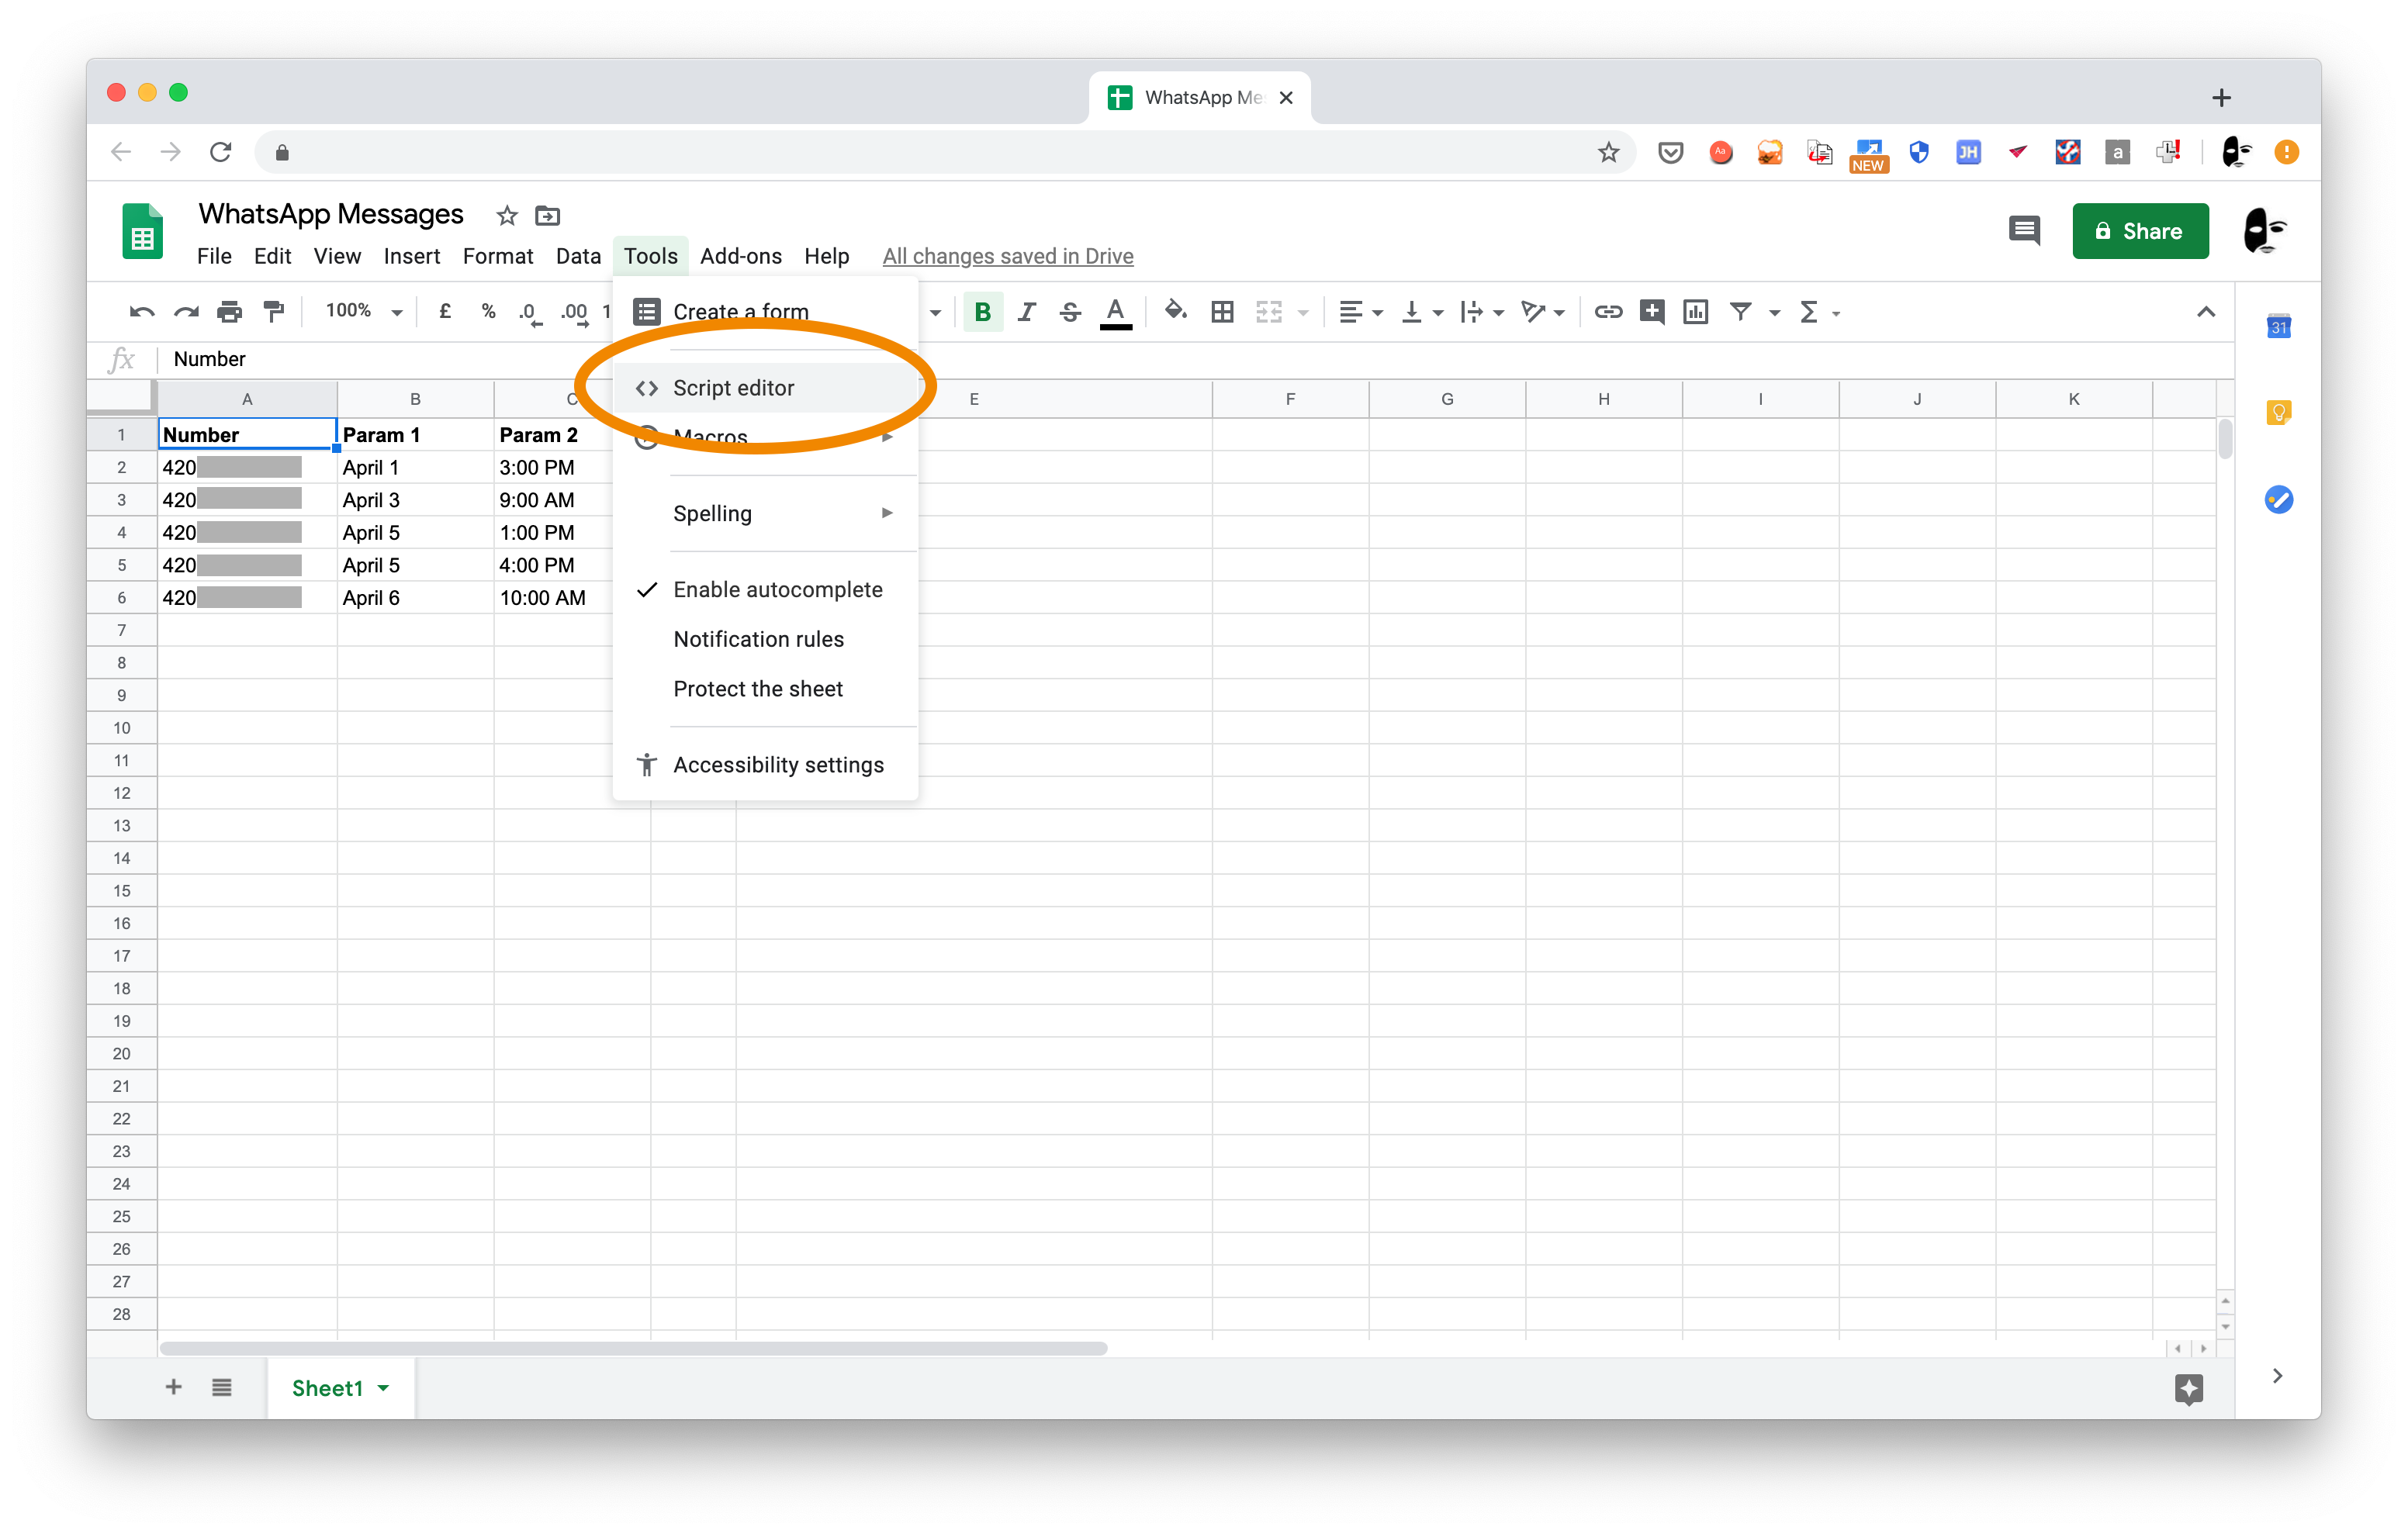
1. Open the Script Editor from the toolbar menu Tools > Script Editor.
const headers = {
    'Content-Type':'application/json',
    'Accept':'application/json',
    'apikey':'YOUR_API_KEY'
  };
Update the apikey header value with your tyntec API key.
const inputBody = {
    "from" : "{{whatsAppBusinessNumber}}",
    "to" : "{{receiverPhoneNumber}}",
    "content": {
    "contentType": "template",
    "template": {
        "templateId" : "appointment_confirmation'",
        "languageLanguage" : "en",
        "components" : {
          "body" : [
                     {
                        "text'": "April 1",
                        "type": "text"
                     },
                     {
                        "text": "3:00 PM",
                        "type": "text"
                     }
                 ]
             }

      }
    }
  };
  var body = JSON.stringify(inputBody);
Update the ‘to’ member with the phone number of your testing recipient and the ‘from’ value with the phone number of your WhatsApp Business Account (WABA).
Replace the ‘templateID’ member with your own approved template that is accessible by your WhatsApp Business Account, and adapt your language if necessary.
The parameters in this code will be used as the content for the testing message. Include as many parameters as are needed in your template.
3. Add a fetch method
Because you’re going to use the Google Sheets table to log the results, you must use the fetch() method from Google Apps Script. Copy the following sample and paste it at the end of your function:
UrlFetchApp.fetch('https://api.tyntec.com/conversations/v3/messages',
        {
            method: 'POST',
            payload: body,
            headers: headers,
            contentType: "application/json"
        });
4. Name and save your script and you can run it by pressing the play button, as shown below
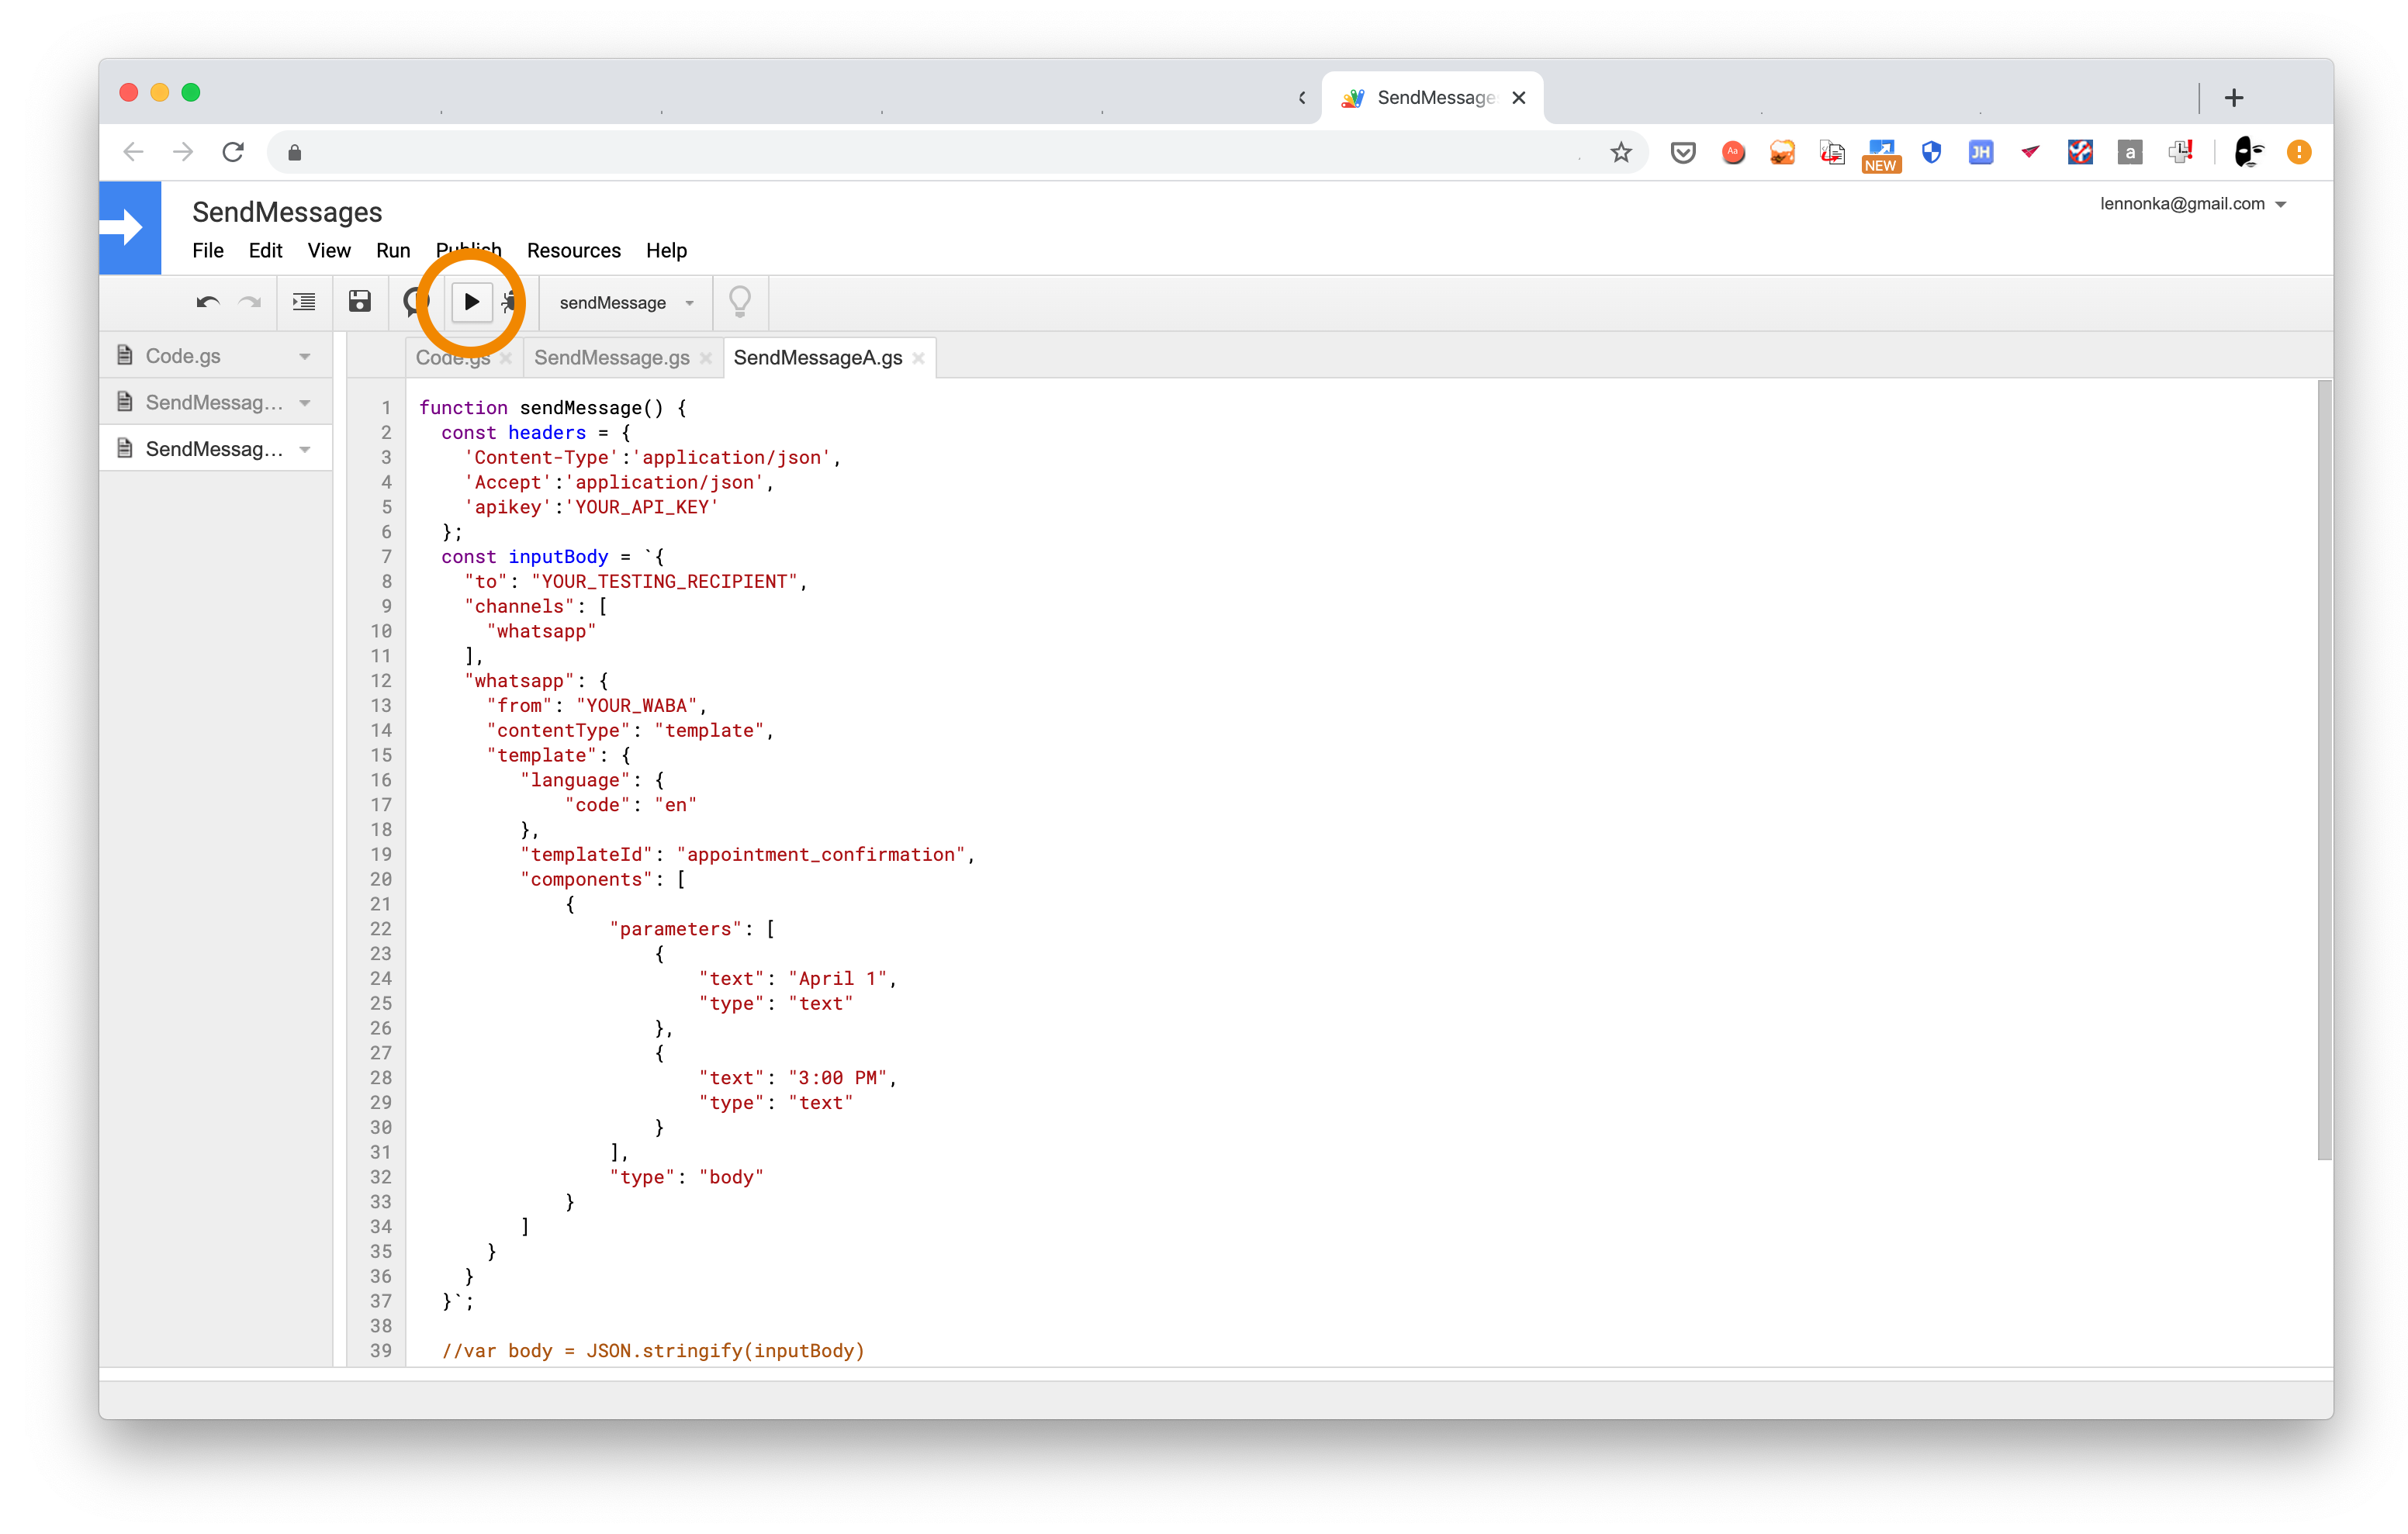
You will be asked to review Google permissions – allow the script to connect to an external service and the script will continue.
Voila! Take a look on your phone, you should have a new WhatsApp message!
Step Three: Level up the script to send the batch
Let’s use your table to send the batch of your messages.
NOTE: We are going to use some functions from Google Apps Spreadsheet service. You can copy code samples from this tutorial or study the Spreadsheets Apps Script documentation.
1. Add some variables to your function to select values from your table. For our example, they will look like this:
var spreadSheet = SpreadsheetApp.openByUrl(SpreadsheetApp.getActiveSpreadsheet().getUrl());
var sheet = spreadSheet.getSheets()[0];
var rangeValues = sheet.getRange(2, 1, sheet.getLastRow() - 1, 5).getValues();
If you need to ignore headers in your table, select the following row, which in our example is 2 as the first argument of the getRange() method.
2. Wrap the logic into a loop to iterate over the values in the selected range, like this:
for (var i in rangeValues) {
  //...
}
The loop must begin before the inputBody definition and end after the fetch() method.
If you run the script now, you should receive the testing message for each row in the table.
3. Now add variables to the inputBody to input values from your table.
Update ‘to’ and ‘text’ members with your appropriate range coordinates, such as:
‘to’: rangeValues[i][0],
- ‘to’ will get values from the first column,
- the first parameter from the second column and so on.
4. In order to log the results, you need to select the cells to be updated, wrap your fetch() method with a try/catch block and based on success or failure, set the values.
Before the fetch() method, add variables with getRange() method for selecting table cells that will be used to log the results.
var result = sheet.getRange(2 + Number(i), 4);
var info = sheet.getRange(2 + Number(i), 5);
If you’re using more than two parameters, you need to increase the column numbers to match the Result and Info columns in your table, which are 4 and 5 in our example.
Wrap the fetch() method with the try/catch block and add setValue() methods to the try/catch block.
try {
      UrlFetchApp.fetch(https://api.tyntec.com/conversations/v3/messages',
        {
          method: 'POST',
          payload: body,
          headers: headers
        });

      result.setValue('SENT').setBackground('#93c47d');
      info.setValue('Sent on ' + new Date());
    } catch (err) {
      result.setValue('FAILED').setBackground('#e06666');
      info.setValue(String(err).replace('\n', ''));
    }
5. Your final code should look like the following.
function sendMessages() {
  const headers = {
    'Content-Type':'application/json',
    'Accept':'application/json',
    'apikey':'YOUR_API_KEY'
  };

  var spreadSheet = SpreadsheetApp.openByUrl(SpreadsheetApp.getActiveSpreadsheet().getUrl());
  var sheet = spreadSheet.getSheets()[0];
  var rangeValues = sheet.getRange(2, 1, sheet.getLastRow() - 1, 5).getValues();

  for (var i in rangeValues) {
    const inputBody = {
    "from" : "{{whatsAppBusinessNumber}}",
    "to" : "{{receiverPhoneNumber}}",
    "content": {
    "contentType": "template",
    "template": {
        "templateId" : "appointment_confirmation'",
        "languageLanguage" : "en",
        "components" : {
          "body" : [
                     {
                        "text'": "April 1",
                        "type": "text"
                     },
                     {
                        "text": "3:00 PM",
                        "type": "text"
                     }
                 ]
             }

      }
    }
  };

    var body = JSON.stringify(inputBody);
    var result = sheet.getRange(2 + Number(i), 4);
    var info = sheet.getRange(2 + Number(i), 5);

    try {
      UrlFetchApp.fetch('https://api.tyntec.com/conversations/v3/messages',
        {
          method: 'POST',
          payload: body,
          headers: headers
        });
      result.setValue('SENT').setBackground('#93c47d');
      info.setValue('Sent on ' + new Date());
    } catch (err) {
      result.setValue('FAILED').setBackground('#e06666');
      info.setValue(String(err).replace('\n', ''));
    }
  }
}
6. Press the play button to run the script, review Google permissions once more, and Voila!
Congratulations on your working table for sending message batches from Google Sheets!
Don’t forget to check the updated table! It should look like this:
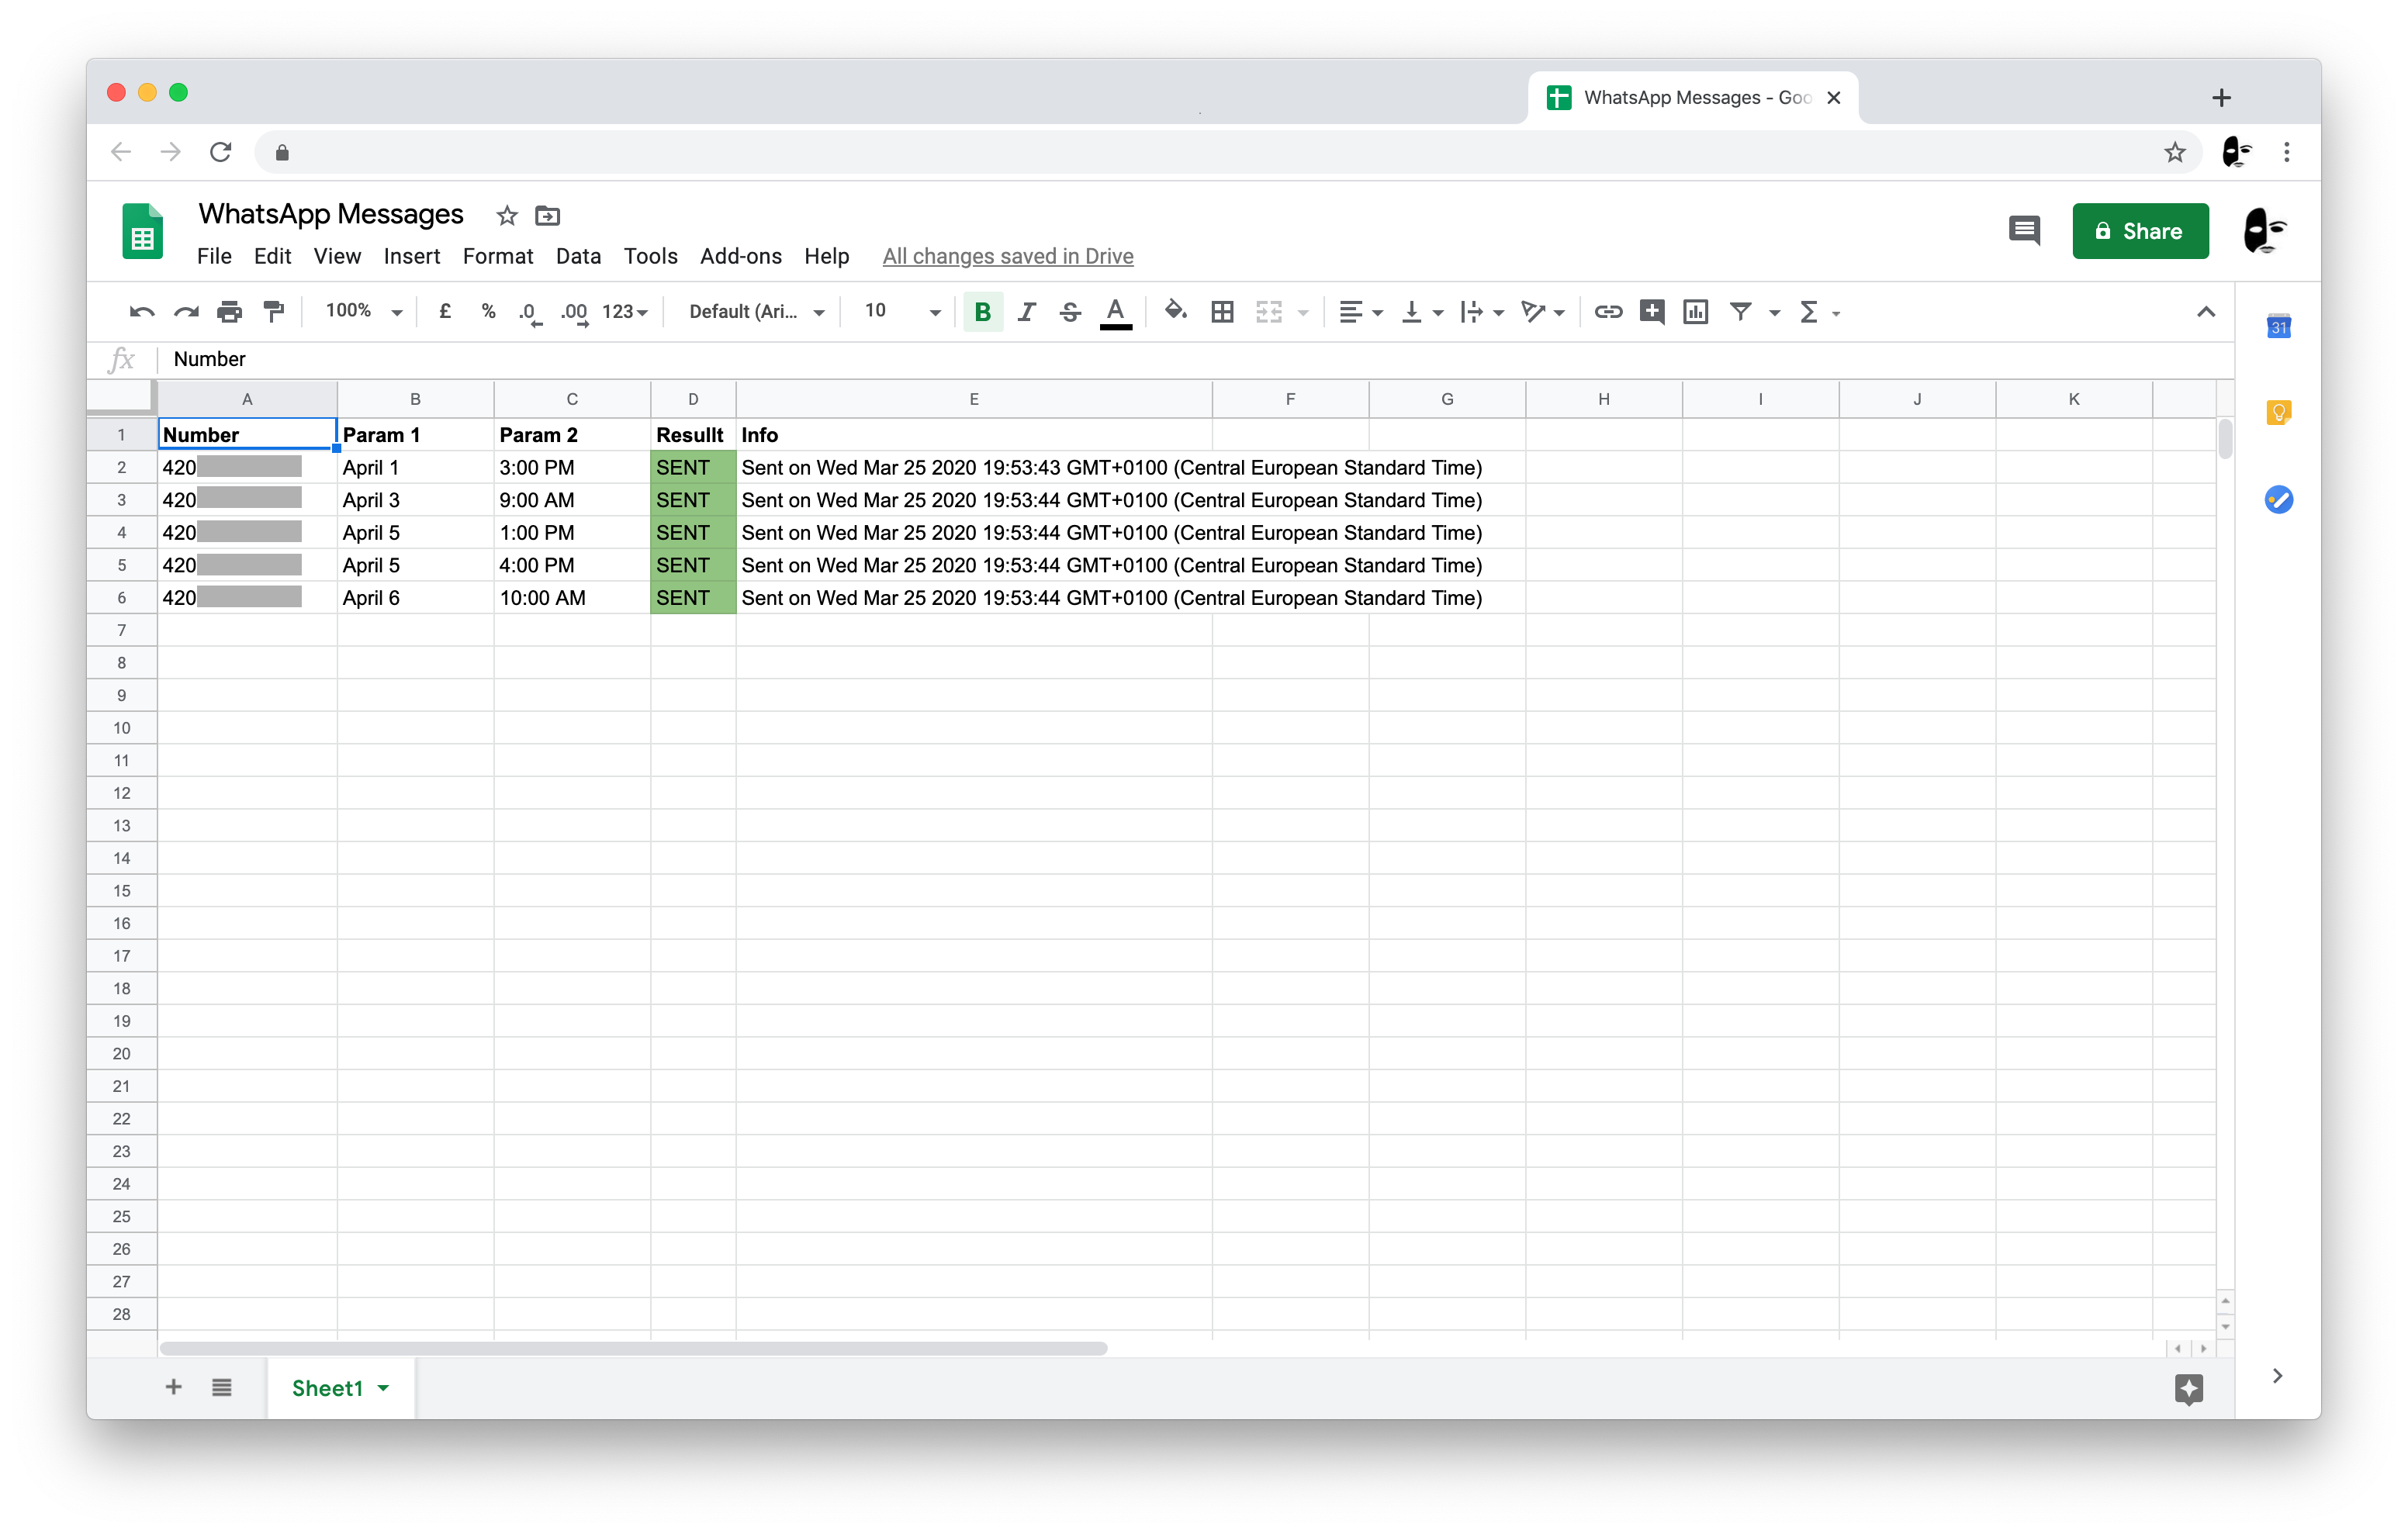
And of course, the phone numbers from your table should have received the messages.
Next Steps
You may want to continue here: