WhatsApp Business API | Integration with Microsoft Dynamics 365
Hi there!
Would you like to enrich your Microsoft Dynamics 365 communication capabilities with WhatsApp template messages?
In this tutorial, you will learn how to integrate Microsoft Dynamics with WhatsApp using the tyntec WhatsApp Business connector and Power Automate Flow. Using this integration, you can automatically send WhatsApp template messages to your contacts after a defined action happens.
You will need
-
- Your tyntec API key from your tyntec account
-
- Your WhatsApp Business Account Number that has been assigned to you by tyntec
-
- A mobile phone with WhatsApp for testing
-
- A testing Microsoft Dynamics account with the Marketing app installed
-
- A Microsoft Power Automate Subscription license in your Dynamics Environment
-
- A Contact in your Microsoft Dynamics with the mobile number set to your WhatsApp phone number
-
- A testing Event record in your Microsoft Dynamics
You can use the default message template named default_welcome.
Step One: Create your Flow
To quickly start with Power Automate and the tyntec WhatsApp Business connector, you will build a sample Flow. Let’s look at what it does.

Not sure how to build a Flow in Power Automate? Check out our video tutorial!
The sample Flow works in your Microsoft Dynamics background and automatically listens to the creation of a new Event registration (the Trigger). Once triggered, it calls the Action Send WhatsApp Template Text message to the assigned Contact in the Trigger.
1. Open your Power Automate.
2. In the left dropdown menu, click the Create button.
3. From all possible Flow types, select Automated—from blank.
Automated flows run when an event triggers, Instant flows on a manual trigger, and Scheduled on a given time condition.
4. In the design window pop-up, use the search function to find the event When a row is added, modified or deleted from Microsoft Dataverse. Then click the Create button.
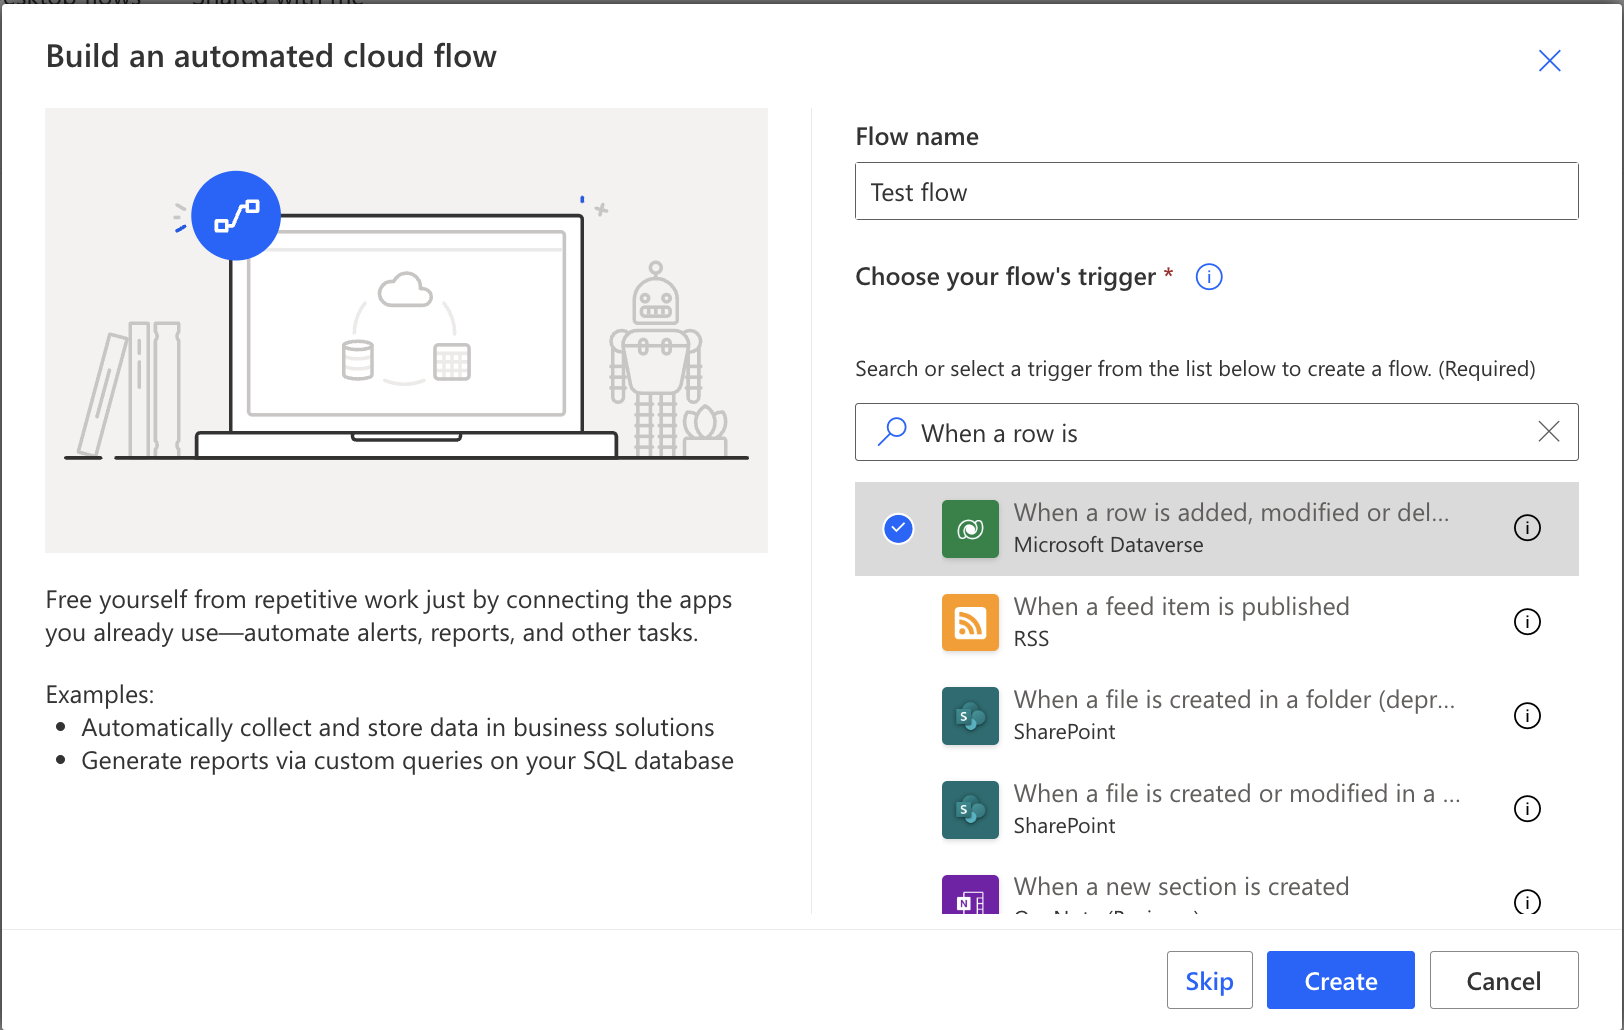
You are now in the UI Flow designer that can add Actions to your Flow and chain them into algorithms. The designer automatically creates When a row is added, modified or deleted trigger step.
5. Within the When a row is added, modified or deleted step, set the Trigger condition to added, The table name to Event Registrations, and Scope to Organization. Your Trigger is now listening for any new event registrations.
6. To create a new action, click the + New step. In the step selection, search for the Get a row by ID action.
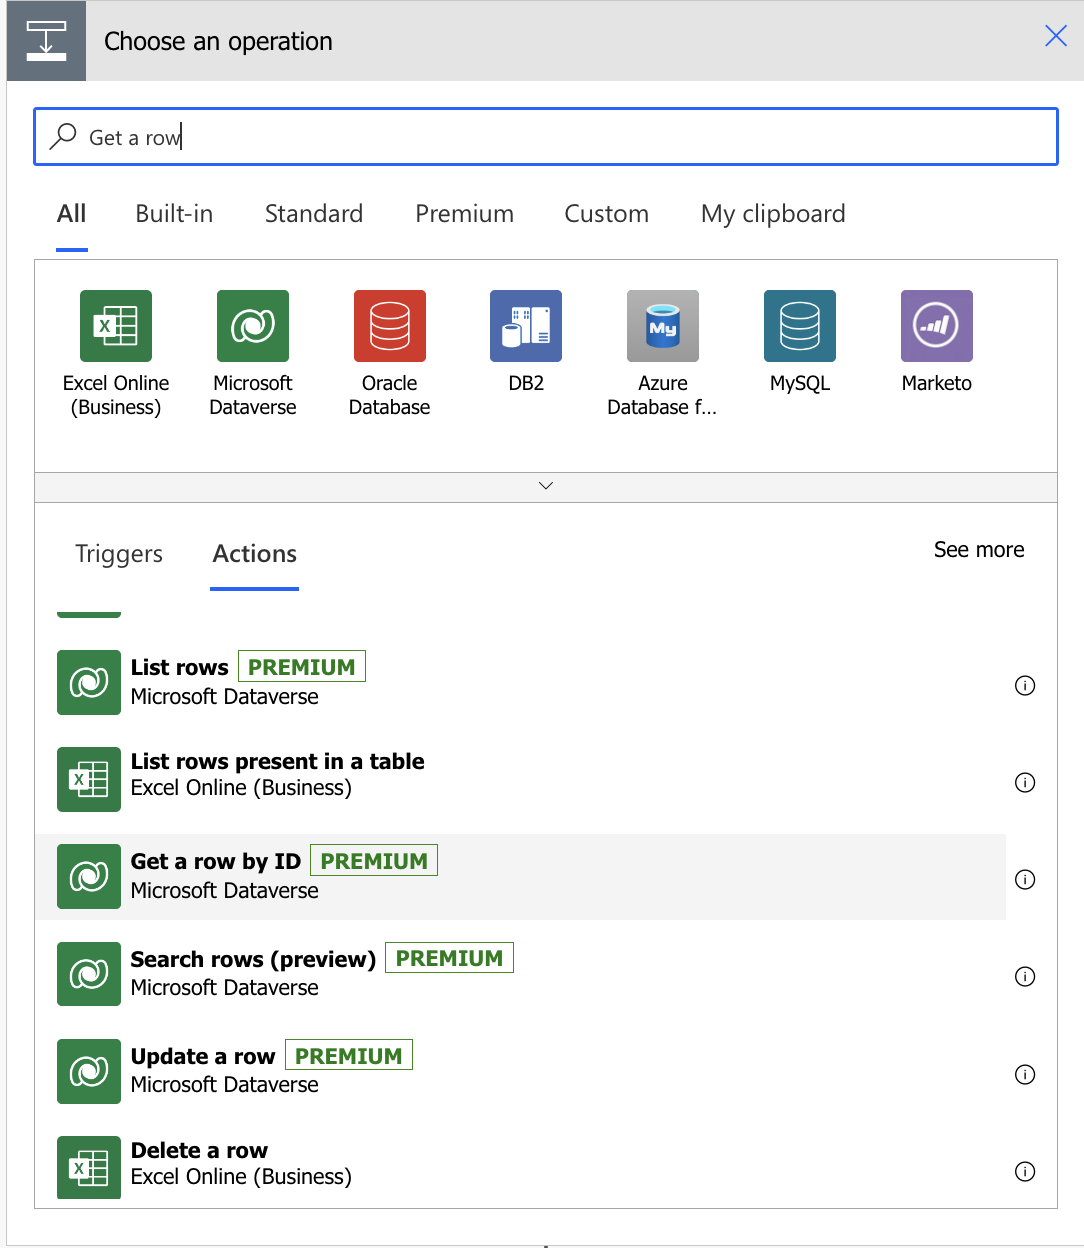
In the Get a row by ID action step, set the Table name to Contacts and Row ID to Contact (Value) dynamic content.
7. Click the + New step. Search for tyntec WhatsApp Business in the step selection, and select the Send WhatsApp Template Text message action.
8. Tyntec Connector will automatically try to create a connection. Name your Connection and set your apikey to your tyntec API key.

Afterward, the Send WhatsApp Template Text message action updates itself to show you different fields.
9. Set parameters:
a. the to field to Mobile Phone dynamic content
b. the from field to your WhatsApp Business Account
Please ensure to use a consistent format for telephone numbers that does not include the “+” sign and adheres to the guidelines outlined in the E.164 standard.
c. the templateID field to your templateID
Please ensure that you only use WhatsApp templates that have been approved by Meta. When prompted to enter a template name or ID, please enter the exact name or ID of the approved template as it appears in your WhatsApp Business Account. Note that the template ID is the same as the approved template name.
d. the templateLanguage field to your template’s language code
Please ensure that you use only the language code associated with the specific templateID that you want to use. You can find a list of supported languages for WhatsApp message templates here.
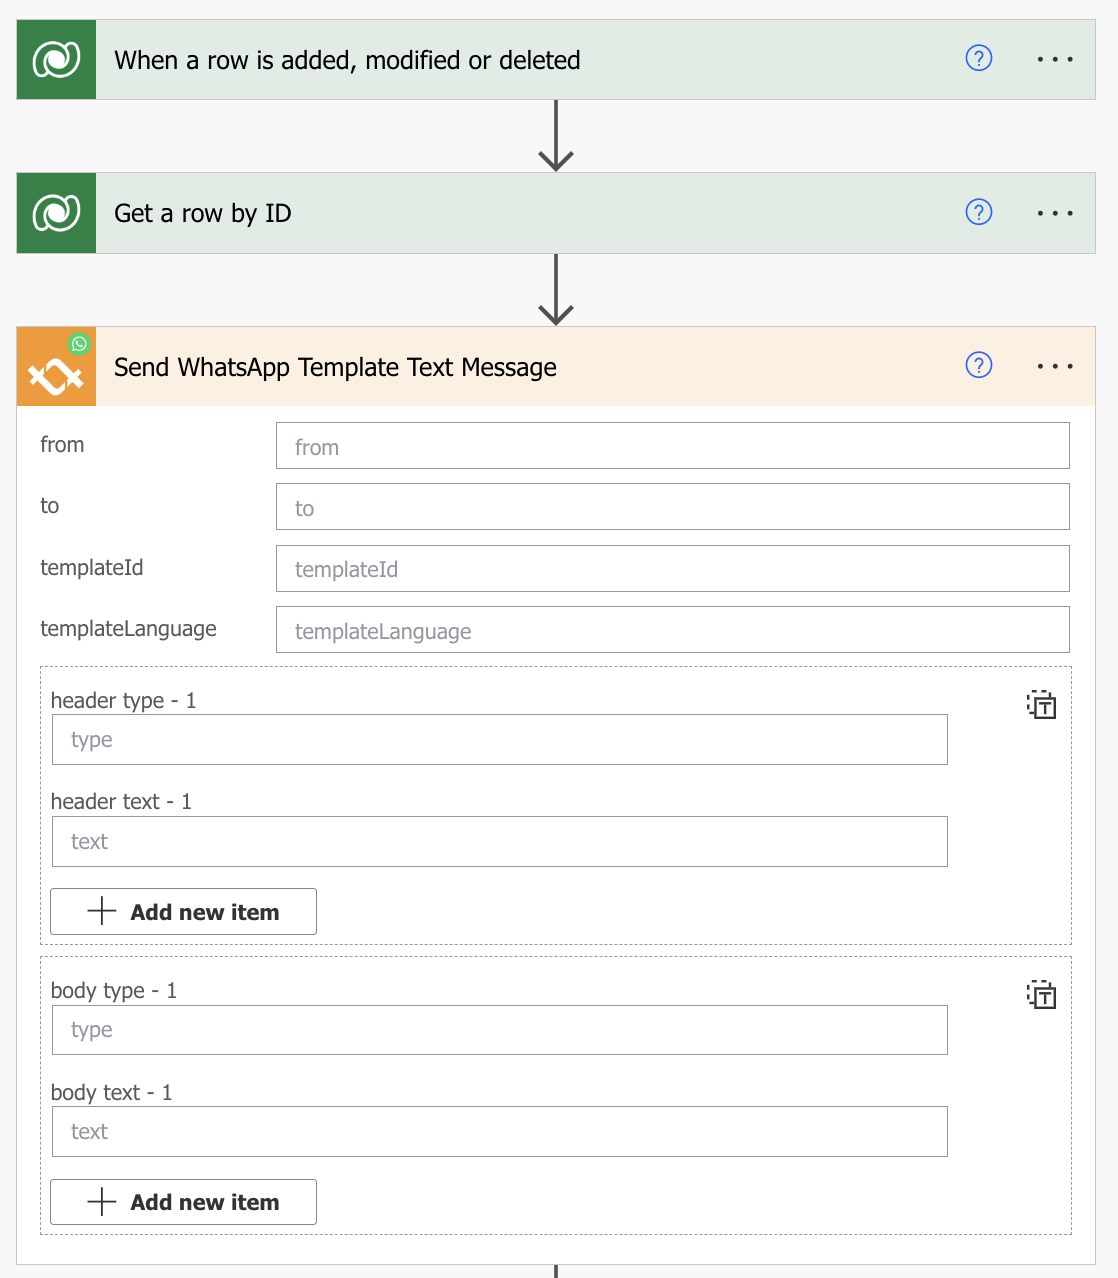
10. Set parameters:
a. body type – 1 to text
b. body text – 1 to your preferred text.
The components body text – 1 specifies the content of your WhatsApp message parameter. Set the value to your desired text.
You can use dynamic content to autofill data. For example, in the default template, you have one parameter, the user’s name. To automatically use it, set the components parameters body text – 1 field to First Name dynamic content.
11. Click Save.
Your Flow will now automatically run when the Trigger detects a new Event Registration.
Step Two: Test your Flow
Let’s try triggering your Flow. In this testing phase, you will create the Event Registration manually.
1. Go to your Dynamics 365 and select your Marketing instance.
2. In Marketing, scroll down to Event Management. Then click on Event Registrations and + New.
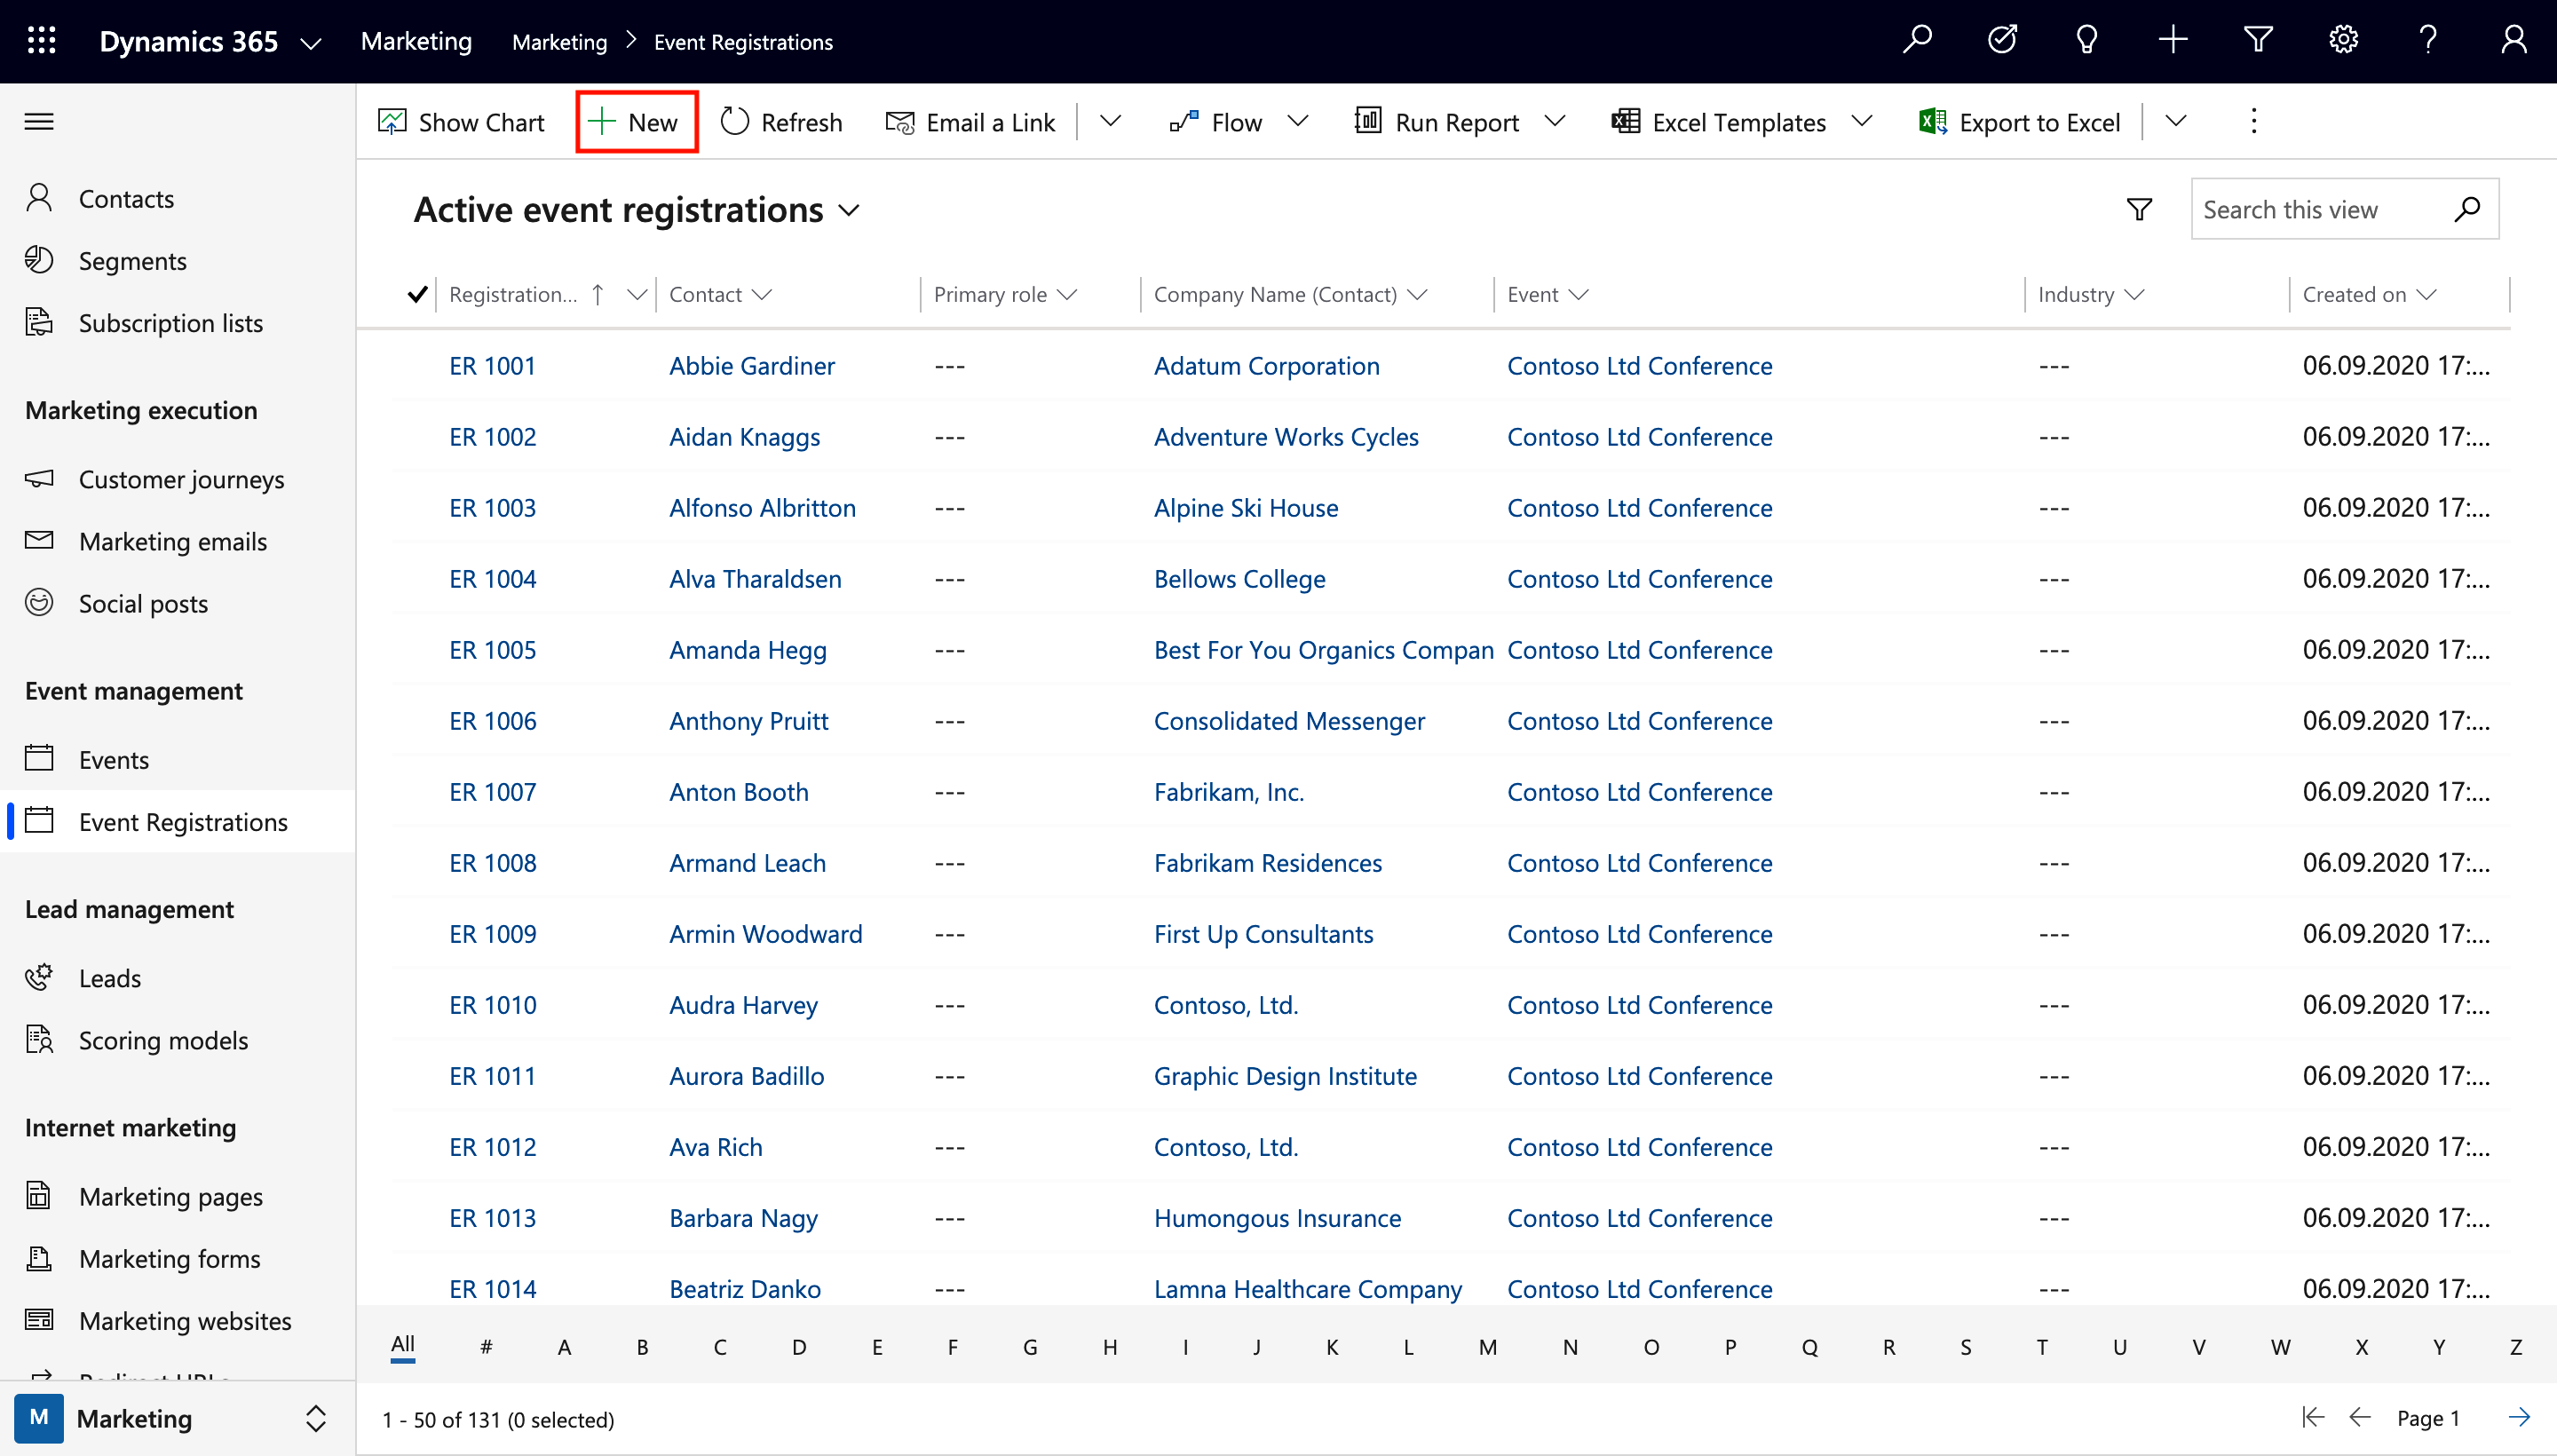
3. Set the Primary role to Attendee, add contact into the Contact field, and add your event into the Event field. When you are happy with the details, click Save.
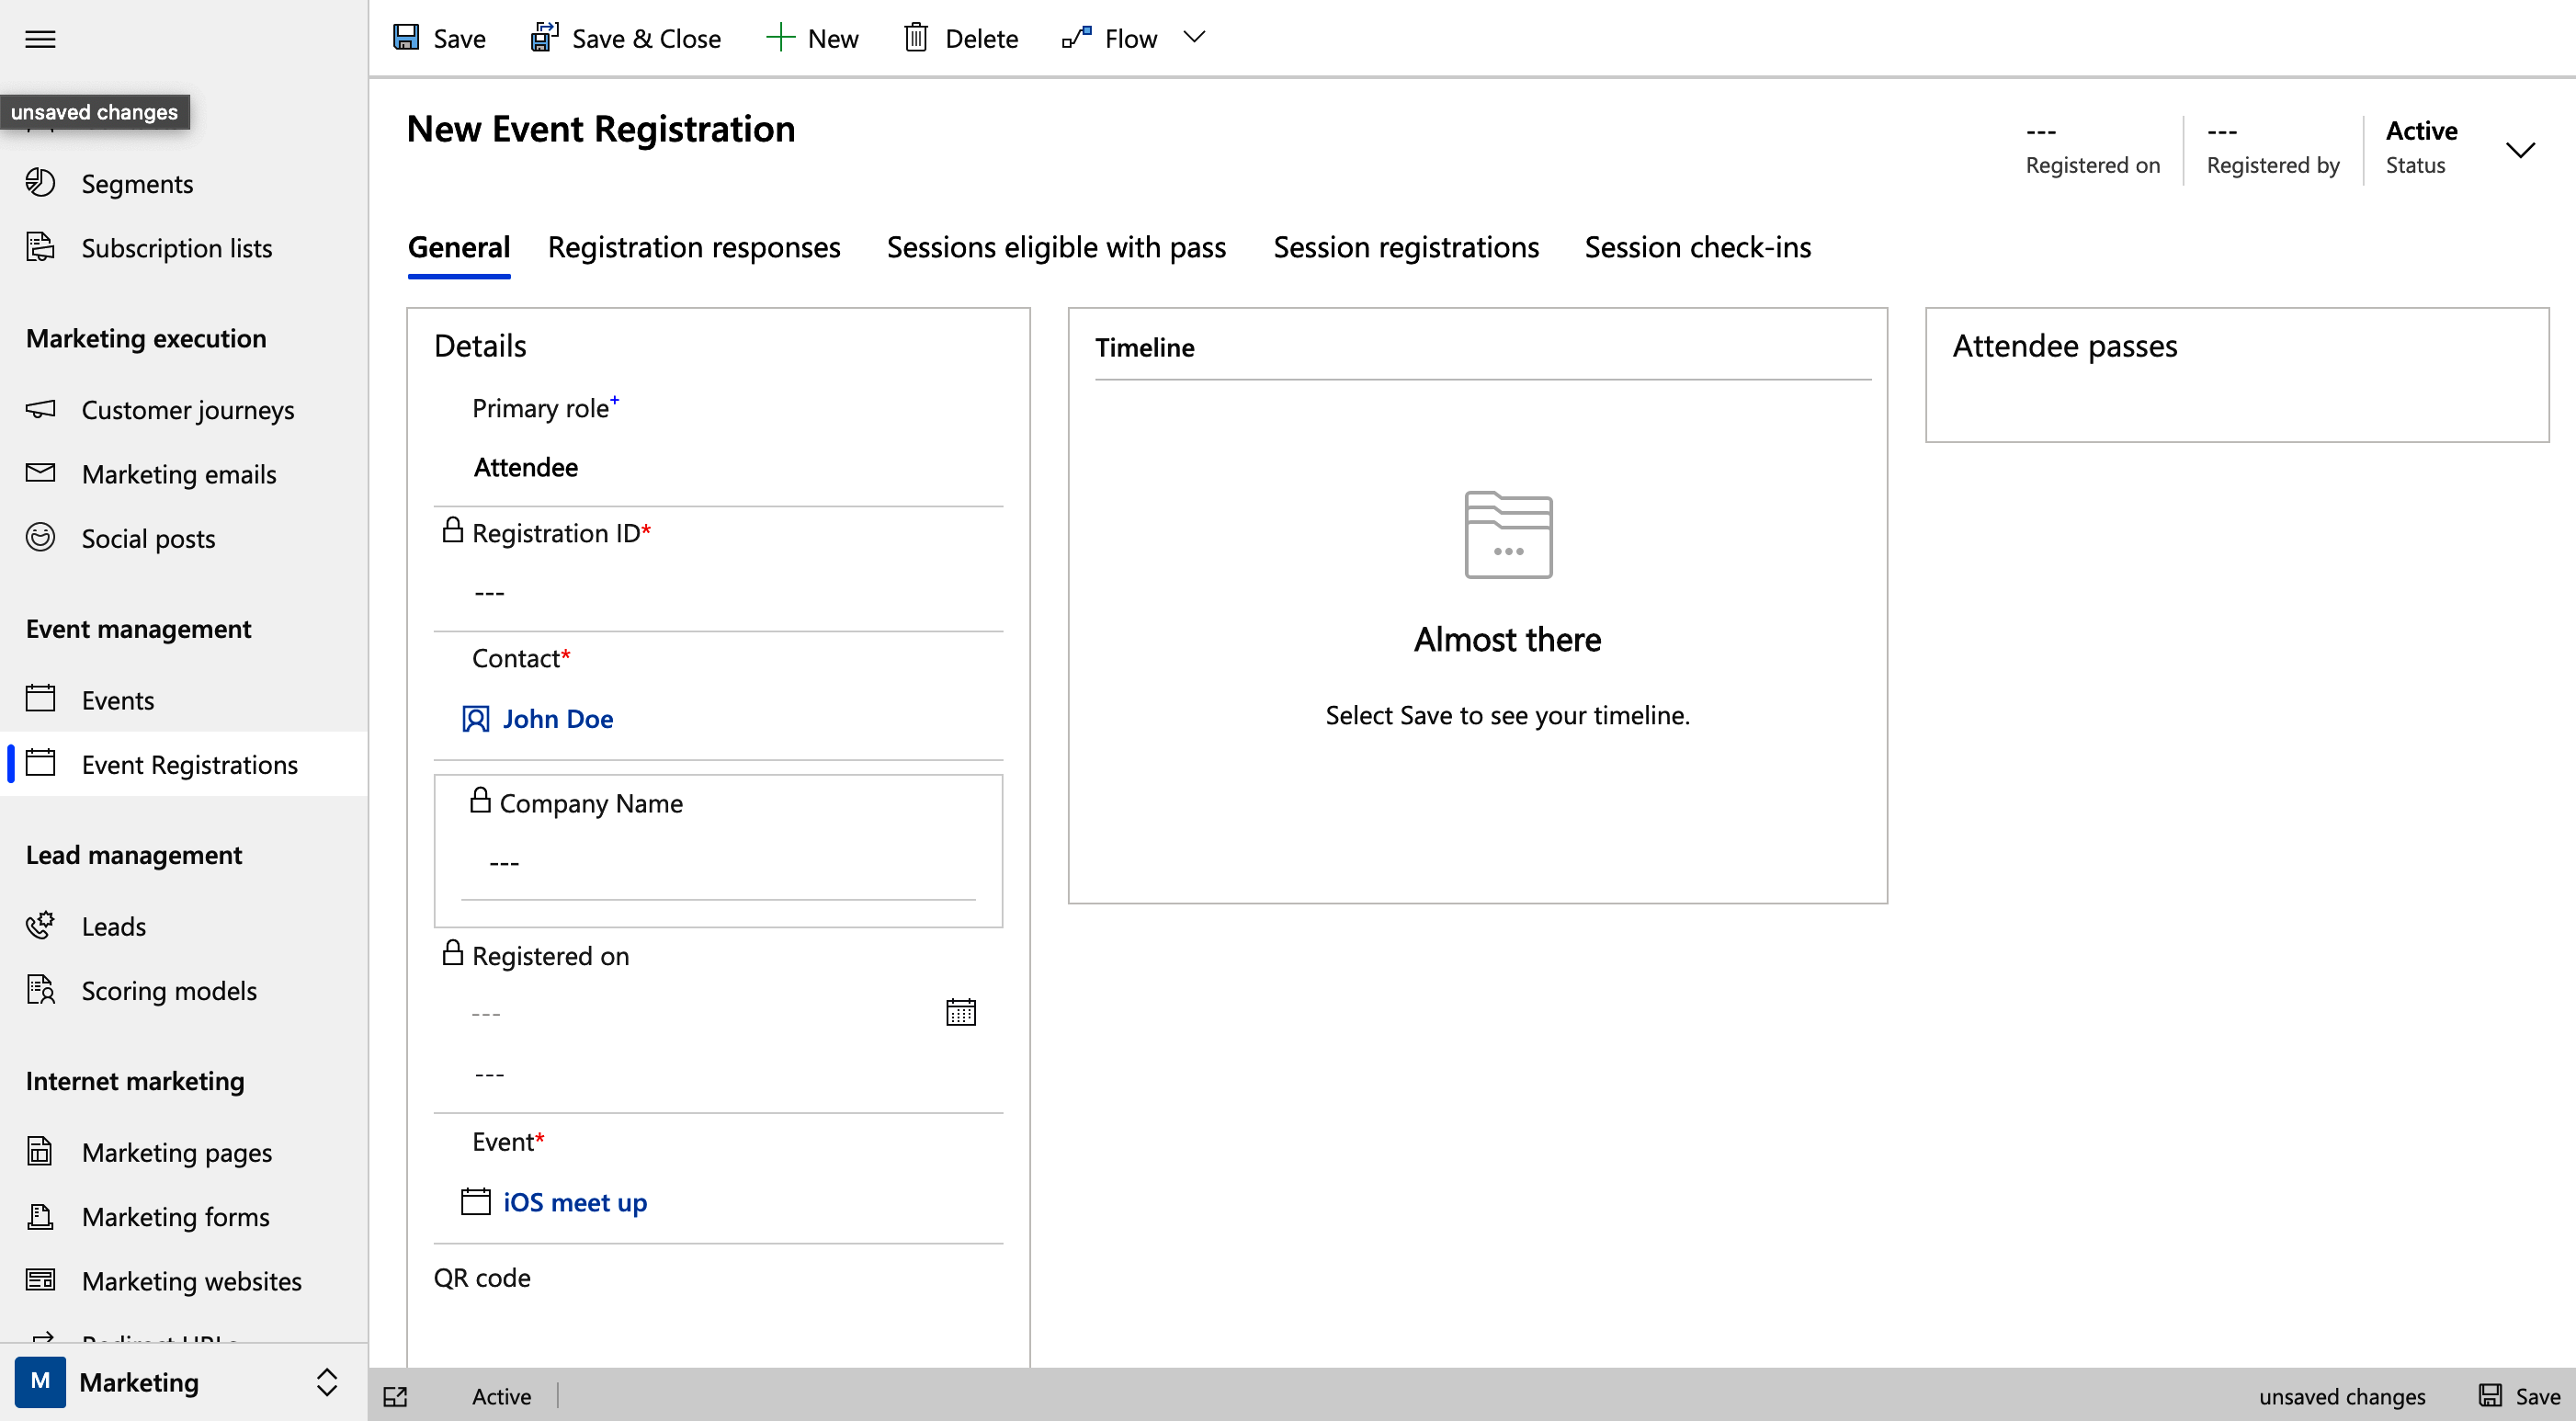
4. As soon as you click Save, the Flow starts. Look at your testing phone, you will see your WhatsApp message.
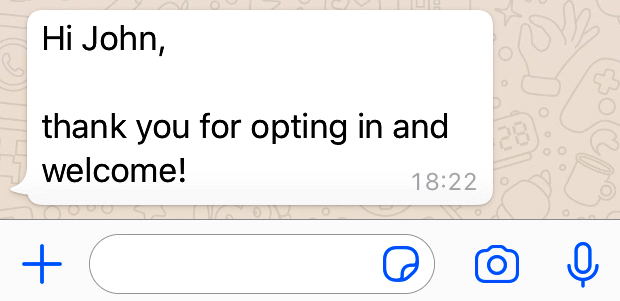
Congratulations on completing your Flow!
More?
The main power of the tyntec WhatsApp Business connector is that you can use it alongside any connector (Dropbox, for example) that is in Power Automate. Using the Microsoft Dataverse you can access any entity within your Dynamics environment.
If you would like to scale the capabilities of this flow, it could be a good idea to add analytics to it. Each time you use the Send WhatsApp Template Text message action the Flow receives a messageId dynamic content as a response. Using the tyntec WhatsApp Business action Status Check with the messageId returns you the status of your message (for reference, look at the API Reference). You can save the response from the Status Check within a custom entity or attach it as a note to the Event Registration using the Create a record action or the Update a record action.

If you want to add two-way messaging to your flows, the tyntec WhatsApp Business connector has the trigger Incoming Message.

It automatically listens to new messages across all channels and if a new message is detected, it starts your flow. All message details are stored in the dynamic content.
